
One thing that can ruin a mountain bike ride very quickly is a mechanical breakdown on the trail. On your long and lonely walk back to the trailhead you’ll have plenty of time to consider this: a quick, regular mountain bike maintenance check might have prevented your on-trail breakdown. Of course some breakdowns just aren’t avoidable so in a follow-up post I will talk about some things you should consider packing in your hydration pack just in case.
To make sure you dont walk out on your next MTB adventure I recommend inspecting your rig weekly or bi-weekly. Most of the checks discussed below require a multi-tool and torque wrench at a minimum but you may want to consider a bike-specific tool kit as well. For those of you who have more carbon fiber than an F1 team, pull out your torque wrench AND the torque tables that are usually included with your bike – cracked carbon tubes will make a grown man cry!
I like to start on one end (usually the front) and work to the back of the mountain bike to make sure I dont miss anything. Here’s the 13-part checklist I use in my weekly maintenance routine:

1. Check the bolts that hold the handlebar to the stem. If there are 4 of them tighten them in an alternating crisscross pattern and make sure that the gap between the bar and stem is uniform. Be sure to check the exact torque amount for your bar, particularly if you’re rockin’ carbon bars up front. For example this Race Face bar wants 55- 65 in/lbs.
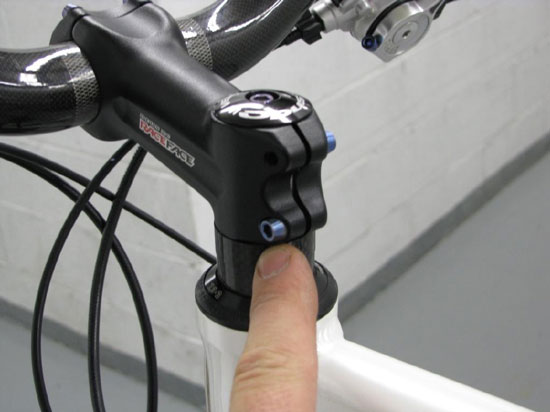
2. Check the torque on your steering tube clamp bolts – for my tube clamp I use 65-70 in/lbs. Also check to see if your steering is straight.
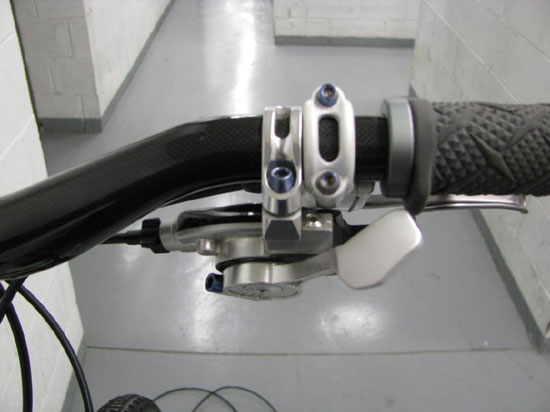
3. Grab hold of your brake levers and shifter pods and see if they securely attached to your bars. Also make sure that the brake lever, when applied, does not touch the handle bar. Check each shifter pod for excessive dirt and correct operation. As always, check your brake lever and shifter manufacturer’s website for proper torque settings.

4. Take a look at your fork and fork seals and make sure the fork is clean and there are no leaks. Make sure the seals are in good condition and that they have not worked their way loose from the fork lowers. Jounce the fork a few times to make sure it is working properly and no funny noises are heard. Also check to see that the settings (air pressure, etc.) on your fork are correct for your body weight and riding style.

5. Moving down to what I consider the most important part on a mountain bike: the brakes. I don’t care how good a mountain bike is, if the brakes don’t work well the whole bike won’t ride well. I had a few times when brakes failed me and well – lets just say that was a hard way to learn my lesson. Make sure that the bolts that hold the caliper are torqued to the correct amount. Hayes wants them torqued to 110 in/lb for brakes that have a mounting bracket and for post mounts you torque them to 80-85 in/lbs. While you’re at it check the torque on bolts that hold the rotor in place. They are torqued at 55-80 in/lbs.

6. If you have a full-suspension mountain bike it’s time to check the pivots and bolts for correct torque. What most people don’t realize is that many of those bolts are alloy or other materials and can be permanently damaged when too much force is applied to them so be careful here and use a torque wrench.

7. Check the rear damper for correct sag and check for leaks as well. Also check the bolts that hold the damper in place for correct torque. To check for sag first set the ‘O’ ring on the shock all the way to the top and then sit on the bike gently – do not bounce. Get off the bike and measure the distance from the ‘O’ ring to the air sleeve. If your bike has literature that tells you the distance then go by that; otherwise a rule of thumb would be 20 30% sag for all-mountain riding and 10 20% for XC riding. Use your high pressure pump to add air to the air chamber unit you reach the correct sag value. Always remember settings are a personal thing so set them to your liking for the terrain you’ll be riding.
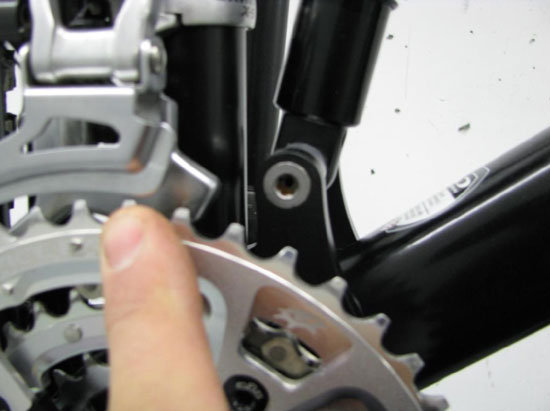
8. Shift the front derailleur into the middle ring and then check the spacing between the cage and the top ring – it should be no more than 4mm and no less than 2mm. Also double check that the derailleur cage is parallel with the chain rings. Check that there is no crud like leaves or small twigs that could stop the front derailleur from functioning.

9. Ok, now we’re at the second most important part on the bike: the rear derailleur. Check to see that the rear derailleur and chain is cleaned and oiled in the pivot points and that the stops are correct and haven’t been moved. Run the bike through each gear to make sure each one shifts crisply. If your shifting isn’t smooth and you don’t know how to make adjustments you can use the image below as a guide. Check to make sure that the main pivot bolt is torqued, 55-65 in/lbs.
I am using 3rd from the high side as a model. Basically look at the driveline from behind and make sure that the chainline is straight . If the upper pulley is a bit to the right wanting to up shift then you need to tighten the cable. If the upper pulley is to far to the left it will want to down shift you need to slacken the cable.
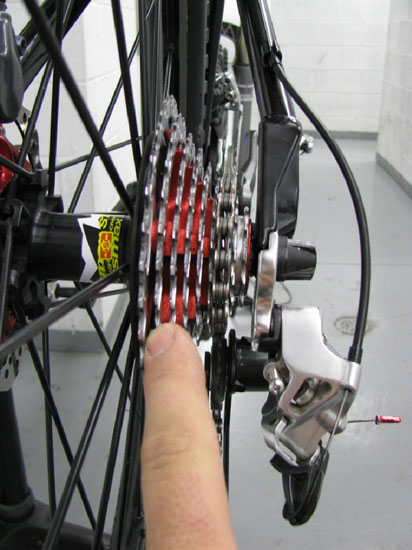
10. Check the chain for any bent links as well as stiff links. If the chain is bent it is usually best to get a new one. See this post for more on changing your a rear cassette and chain.

11. Check your cassette for bent teeth and wear. If the teeth begin to look like sharks teeth its time to get a new cassette. It may also be a good time for an upgrade. Pictured above is the Sram 990 cassette with 991 chain – good quality without breaking the bank.
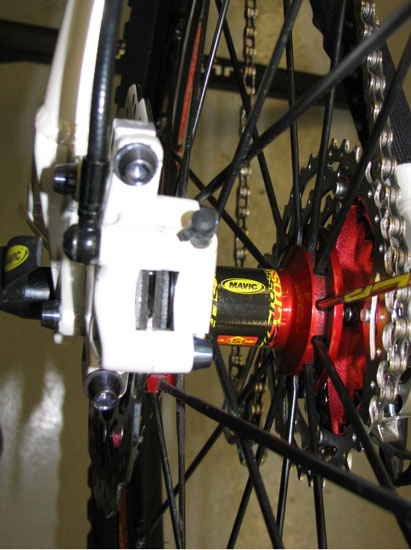
12. Check the torque on the rear brake caliper bolts just like you did on the front wheel. The mounting bracket is torqued to the frame at approximately 110 in/lbs and the caliper at about the same (doublecheck your manufacturer’s torque guide).
Check the amount of brake material that is left in the brakes pads as well. If it looks like you have less than 1mm, time to change them. Less than 1mm is considered unsafe.
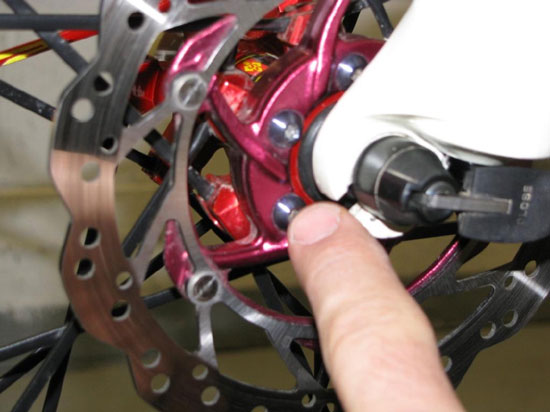
13. Finally check the torque on the 6 bolts that hold attach your brake rotors to your wheels. If you have Shimano center lock you need to remove the wheel and use the special tool for that. The 6 bolts are torqued at 55-80 in/lbs.
Well folks I hope this helps you enjoy more riding and less walking. Just like an automobile we need to keep up with our mountain bikes and maintain them. Hope this guide helps keep you from walking out.




10 Comments
Jan 22, 2009
But a through cleaning is every other week. Using a spray bottle filled with hot water. to loosen all the grim that is built up..I just don't recommend anyone using a pressure washer.
Jan 25, 2009
Thank you for the clear writing style and good photos! I'm just embarrassed that my bike is not that clean :-{(}
Jan 4, 2022
Jan 22, 2009
Jan 22, 2009
Jul 10, 2014
Jan 25, 2009
If you just clean off your bike after your ride, removing all the water and mud and a quick lube of the chain that is the best thing you can do.
Jan 22, 2009
Feb 18, 2016
Jan 24, 2009