
Editor’s Note: “Over a Beer” is a regular opinion column written by Greg Heil. While Greg is the Editor in Chief for Singletracks.com, the opinions expressed in this commentary are his alone and do not necessarily represent the opinions of Singletracks.com.
One of the beautiful things about the mountain bike is how much you can change and modify your bike once you’ve purchased it. While there are general limitations based on the frame design, if you’re operating within reason you can modify or upgrade every single component on your bike except for the bare frame itself. And sometimes if you have enough tenacity, even modifying the frame is within the realm of possibility.
If you think about it, very few other human powered outdoor sports require the high level of technical gear that mountain biking does. But on the flip side, other types of outdoor gear isn’t nearly as customizable. Sure, you can tweak and tune a surf board, a pair of downhill skis, the gear in your climbing rack, maybe your whitewater raft… but all of these items provide very limited adjustability.
With skis—one of the sports I am most intimately familiar with after mountain biking—you can wax your bases a different way, tune your edges in a different fashion, or install one type of bindings instead of another. But if you actually want to change the ski itself, guess what? You can’t! It’s time to buy another pair of skis for the quiver.
Mountain bikes, on the flip side, allow you to customize them to your heart’s content. I personally begin by focusing on comfort and contact points to fit my body, and then move outwards from there.
Above and beyond fit, which is vitally important, what do most other upgrades do for you? Essentially, they make your bike ride better, provide you with better control, and most of the time, they allow you to go faster.
Don’t get me wrong: all of those reasons to upgrade are very good things, and I upgrade my personal bikes for those very reasons. But if we ask ourselves why, at the core, we mountain bike, is it to go faster, simply own the lightest bike, or rail the corners the fastest?
While perhaps all of those things play into it, I think we can all agree that the #1 reason that we mountain bike is because it’s fun.
If having fun is the main reason we ride, then it stands to reason that we should upgrade our bikes to be as fun to ride as possible. And I think that the #1 component that makes mountain bikes more fun to ride is the dropper post.
Droppers aren’t new by any stretch of the imagination. I’ve been using one on my personal bike for over half a decade now. But remarkably, many riders are still not using them.
Why is this?
I think a major contributing factor is that many mountain bikes still don’t come stock with a dropper post. This is especially true on the lower end of the market, where a dropper post is skipped over to save cost, as even mid-range dropper posts are extremely expensive when compared to a rigid post churned out by the thousands.
To all of those riders not using a dropper post yet, I say “do it!”
If my endorsement is good enough for you, great! But if not, here’s some more convincing.

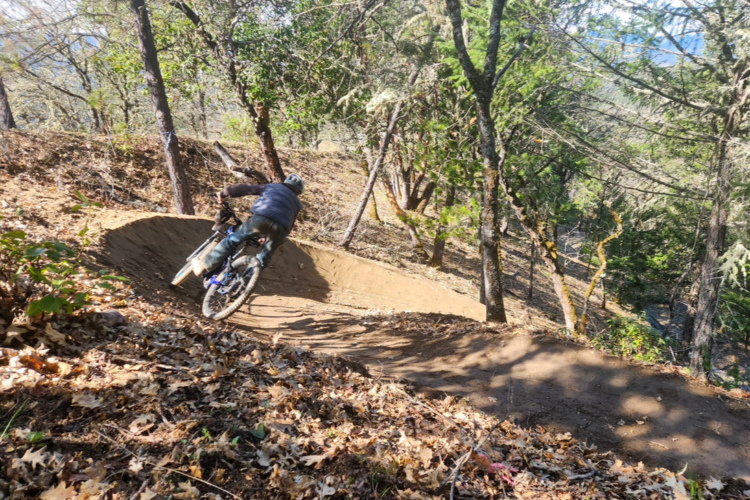
In my mind, the biggest problem with a rigid seatpost is that it won’t allow you to corner properly when it’s all the way up in the ideal pedaling position. We’ve discussed cornering in great detail in other places, but in short, to truly corner well, you need to lean the bike into the corner while keeping your weight centered above the bottom bracket. With a seatpost all the way up, it’s simply impossible to achieve proper bike lean and your bike will either be too upright or your weight won’t remain over the bottom bracket, meaning that you’ll be off balance, slow, and uncertain of yourself in corners. Cornering well is a whole lot of fun, and droppers make it easy to corner properly all the time, even when the turn comes up on you suddenly.

The other major benefit of a dropper post is that it gives you way more room for the mountain bike to move vertically beneath you. As you descend a technical trail at speed with rocks, rollers, jumps, drops, and more, dropping the seat allows your bike much more room to flow up, down, and around all of the chunder, as your torso moves calmly down the trail in a straight line. Flowing down a fast, technical descent is incredibly fun, and a dropper post allows it to happen naturally. With your seat all the way up, your saddle is constantly coming up to smack you in the rump, and instead of allowing the bike to flow and your body to remain calm, your body is forced to move with your bike.
The most common objection to dropper posts, above and beyond the weight and the cost, is “well, I have a quick release on my post, so I just stop at the top of the descent and drop it.” While that can definitely be a great solution for some descents, the beauty of a dropper after you’ve used it for a while is how quickly you can activate it with minimal conscious thought. Personally, I find myself dropping and raising my seat literally dozens of times during a mountain bike ride, even in non-downhill sections of flow trail with corners, so that I can corner fast and enjoyably, as noted above. With a QR seatpost clamp, I literally can’t—or wouldn’t want to—stop that many times to raise and lower my seat. That wouldn’t be much fun, now would it?
If you’re still on the fence about a dropper post, I encourage you to just give it a chance and try one out. And don’t write it off after just the first day, either—spend some time with it, find a comfortable position for the lever on your bar, work on training yourself until it becomes natural, and if you decide to switch back to a rigid post after riding with a dropper for a week… let me know in the comments section below!
If you need help picking the best dropper for you, be sure to check out Aaron’s excellent Dropper Post Buyer’s Guide.





42 Comments
May 18, 2016
May 19, 2016
A massive amount of weight? At best, it'll add 1/40th to your bike's relative weight (.5 lbs on a 20 lb bike.) It's also non-rotating weight so you won't notice it while sprinting, pumping, or climbing.
May 18, 2016
My point was, the future is now. They've ALREADY had several years of development. Will they continue to get better? Yes, of course. That's how all products work.
And if your buddies really aren't using their droppers, why don't you see if you can borrow one of theirs for a while?
May 19, 2016
Ok, I was using a 450 gram dropper post compared to a 200 gram seat post. I'm sure some are heavier/lighter.
It's still 1/20th of the bike weight, and if we add in rider/equipment weight, it's closer to 1/150th or more of the weight.
May 19, 2016
May 18, 2016
May 19, 2016
May 19, 2016
May 20, 2016
May 19, 2016
Like anything on our bikes today, they require maintenance. Everything on our bikes is lighter and more complex than it was in 1991. Hell, take my MAG21 shock, I think I did maintenance on it once every 3 or 4 seasons. Simple open bath design and heavy (duty) by today's standards.
Simple fact today is you either need a good shop or you need to get the proper tools and wrench on your own bike. Nothing is completely set and forget on our bikes today. You need to ride an all rigid fat bike to achieve that level of unconcern for component health.
You are correct the southpaw remote is useless for a Reverb. A Reverb is hydro activated. A good, albeit expensive remote option is the one from Novyparts. http://www.pinkbike.com/news/novyparts-rockshox-reverb-remote-review-2015.html
May 19, 2016
May 19, 2016
I'm definitely a dropper post believer, however, I've learned it's not for everyone. Since I've moved to southern Michigan, the majority of riders here don't use one and the trails don't really call for one. The riding out here is definitely the XC variety with only a few downhill sections (I'm talking like 30 seconds).
That said, I still use my dropper on every ride because it definitely makes riding more fun!
May 19, 2016
May 19, 2016
May 22, 2016
May 19, 2016
One of things that's held me back is the difficulty in deciding which one to get, as there doesn't seem to be a convenient way to do a longer term test (a week?) of my top 3 choices. It seems common for people to buy and sell 2 or more of them before they settle on their preferred one. Is that they best way to do it or do you have a better recommendation?
May 22, 2016
The only way I know to get a week or so test period is renting a bike that comes with a dropper for that long of a period. However, that could cost a pretty penny unless you're in really good with your LBS (or write reviews for a reputable website.)
I've mostly used Specialized droppers along with a TranzX on my Fatboy, and they've been reliable. Some folks don't like the fact the command posts are not infinitely adjustable, but I love the set point factor (unlike the TranzX). My suggestion is see if you can ride some friends' bikes to see which one you like. That may be one of the reasons people need a try a few before finding one they like.
Also, if you're running a 1x, find one that's compatible with lever that looks like a front derailleur level. It makes using the dropper second nature!
May 19, 2016
Some of the KS droppers I've used on review bikes have been a bit finicky to set up the cable tension (adjusting your seat height during bike setup with an internally-routed cable-actuated post can be tricky), but honestly, they've worked pretty good for me too. I've used a couple of the old school Gravity Droppers and while I think the newer posts are way better, the older ones got the job done.
All that to say, I honestly think that the "droppers are unreliable" crap is overstated. While maybe it wouldn't be a good idea to buy a used dropper post that's 3 years old, the new crop of posts is pretty dang impressive.
The one possible thing to look at is whether or not you want to use a southpaw remote if you're running a 1x drivetrain. The Reverb isn't compatible with a Southpaw (someone correct me if I'm wrong on this), and the southpaws are pretty dang awesome & intuitive.
May 23, 2016
May 19, 2016
May 18, 2016
May 19, 2016
May 20, 2016
May 18, 2016
I really enjoy these discussions. I hope we can enjoy a conversation around a real beer again sometime.
May 18, 2016
As with any new skill, it will take time to learn, but it will soon become second nature. In fact, I find myself reflexively searching for the dropper remote button on test bikes that don't have one mounted.
May 18, 2016
May 19, 2016
May 18, 2016
I can honestly say that the dropper post is a must have if you are an all mountain rider like me. I often climb up the trail and bomb down the hills and having the post down made a huge difference in my control. If your a XC Racer or Downhiller who takes lifts, don't get a dropper. Everyone else get one.
I feel that the dropper is one of the more important innovations to come to MT biking, along with rear suspension and fork lockout.
May 18, 2016
Beyond the improvements in geometry in recent years (and these are truly most important of course), I would say that the dropper post and wider handle bars/short stems are the two developments that feel most beneficial to me while riding. For some riders wider bars are not desirable because their trails have too many narrowly spaced trees. But if that is not your predominant riding setting (and your setting is beyond beginner type trails), wide bars are the way to go. And I may be wrong, but I'm guessing there is no longer any argument for long stems unless your frame does not fit you properly. Maybe plus sized tires and increased tire diameters could be argued in favor of also for really helping riders, but I haven't moved in that direction yet.
May 19, 2016
Greg - I'm coming to Colorado this summer. Please teach me how to appreciate the dropper post. I'm willing!
May 24, 2016
May 18, 2016
Admittedly, I don't adapt to change well. After (4) decades of riding dirt bikes, I'm just too used to having that seat between my legs. Even when I do drop it, I don't drop it more than 2-3 inches so that I can always squeeze the seat between my legs. Dropping it completely out of the way is NOT an option. Also, after 25 years of riding mountain bikes, I've pretty much perfected my technique for hanging my rear end off the back of the saddle.
I also agree with what others have said about reliability. Among my group of friends, we can't go (2) weeks without somebody having some issue with one of their droppers. One guy is on Reverb #3 in less than a year and just this past weekend on a trip to Utah, we had issues with a KS that wouldn't drop and then a Crankbrothers model that wouldn't stay up. For what they are charging for these things, they should be more reliable.
May 19, 2016
May 12, 2018
If the guys you ride with are not using their posts because they are not working properly, you should look into the Canadian made 9point8 Fall Line dropper post. With cold temperatures in mind, they specifically made the internals mechanical which isn't effected by cold weather.
May 19, 2016
The thing is, the faster you go, the more you have to lean the bike over to make it around a corner. Having the seat up limits how far you can lean the bike over without leaning your body with the bike, so either you slow down, or you lean with it and feel the bike sliding and think that's as fast as you can go, not realizing that if the seat was out of the way, you could go quite a bit faster and do it safer too.
May 19, 2016
May 18, 2016
A dropper is one of those advances where yes, they are pricey.. They seem extravagant, but once you use one on a bike with anything near modern geometry such as the slacker head angles(and even not so slack), you will wonder how you ever lived without it.
What people often miss and I see it in photos on facebook, videos on Youtube, all on the web and even live on trails, is that the newer geometries allow one to ride in a much more neutral position when descending. Feet heavy and weight over the BB. That said, lowering oneself deeper into the attack position allows for lower center of gravity, more mobility and far greater control than sliding the hips and weight back. The dropper post facilitates this and is worth its weight in gold for that reason.
If your trails don't require it, then I can see that. If you are truly ridding all mountain and descending anything remotely steep or gnarly, then having a dropper will only up your game, your comfort and your safety and stability. Hell buy a cheap cable operated one for just over 100 USD and try out the concept, then decide if you want to drop 400 for a good one.
May 18, 2016
May 12, 2018
I can’t see buying what should be a 30 dollar part that is sold for several hundred dollars (and they break more frequently as well).
I would buy one if I was a professional rider...... ie.... someone would give me one.
My two cents
May 24, 2016
May 25, 2016
May 13, 2018