Trails are tough things to wrangle. The squiggly lines on a map resist most forms of organization, and never quite fit onto the rectangular pages they’re printed on, let alone the flat screen of a computer or smartphone. Trails are living, breathing, organic corridors running through wild and natural spaces and as humans, we can’t help but want to explore and then share them however we can.
Sharing mountain bike trail information has been a big part of Singletracks’ mission from the start, and to do that we rely on a global community of mountain bikers to catalog the branching veins that deliver our stoke. If you’ve got a new trail you want to share with the Singletracks community, here’s how to make that happen.

Add the trail information
Before you fill out this form to add a new trail, do a quick search on Singletracks to make sure the trail isn’t already on the site. You’ll also need to register for a free account which helps us get in touch in case we have any questions about the trail. The form itself is pretty straightforward, though you may find these tips helpful.

The first field labeled Trail System refers to a larger network, which only applies if the trail you’re adding is part of a collection. For example, if you were adding the A-Line trail at Whistler Bike Park, you would start typing Whistler Bike Park in the trail system field, and select it from the list. If you’re adding a trail that’s not part of a larger system — say Trail 401 in Crested Butte — you would just leave the trail system field blank. If you’re planning to add a new system and also the individual trails within that system, add the trail system first, leaving the trail system field blank, then each individual sub-trail, making sure to select the trail system for each sub-trail.
- The country drop-down menu is organized into regions so be sure to select a sub-region after making your initial choice.
- Trail type and configuration aren’t that important, so if none fit exactly, just choose the closest, best choice.
- Please enter the trail length in miles. We’ll display the length in both miles and kilometers.
- You can include an address in the directions box and/or describe the best way to find the trail. We’ll ask you to show us the trailhead on a map as well, farther down the form.
- Use the description field to describe the trail: the types of features, scenery, amount of climbing, etc. Also be sure to give a shoutout to the builders and maintainers if you know who they are!
- If you have photos from the trail, you can add them on this form.

In the trailhead location block, click the button to pull up a map of the area. Then, click a spot on the map to show us where the trailhead is located. Note: This should be the spot folks will use if they are navigating to the trailhead in a vehicle, so try to choose a parking lot or the closest road access point.
After you submit the form you’ll be directed to the new trail page. From the trail page you can add even more details if you like, including a complete map of the trail if you have one. If this is a new trail that’s just opened, consider sending us a note so we can include it in our monthly new trail roundup article.
Add a map
Despite their best efforts to resist mapping (re-routes, closures, and overgrowth, oh my!), mountain bikers rely heavily on maps to find places to ride. It’s a big part of the search functions on Singletracks so if you have a map of the tracks it’s a really helpful thing to share. Unlike some other sites, the maps you share on Singletracks are available to everyone, free of charge.
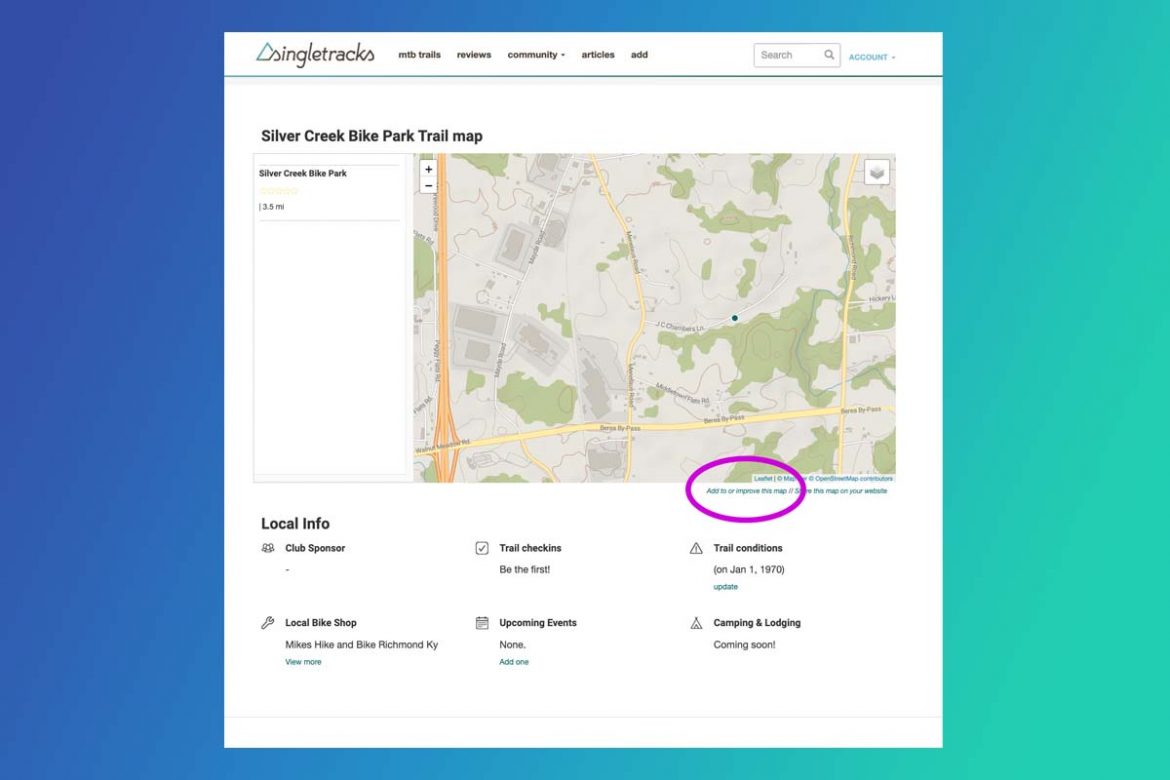
If you added the trailhead location on the trail form in the previous step, you’ll see an area map midway down the page with a dot at the trailhead. Look for the link below the map as shown in the screenshot above.

If you didn’t add a trailhead on the form earlier — perhaps because the trail is accessed via another trail and not directly from a vehicle-accessible trailhead — the link to add a map will look a little different, as shown in the screenshot directly above.

You can submit trail map data in GPX format using the simple form shown above. Give the map a title — the trail name usually works — and select a GPX file. If your trail data is in another format you can usually convert it online at GPS Visualizer. Also, if a trail already has a map but it’s wrong or needs an update, use this same form to submit new trail map data.
If possible, clean up your GPX data as much as possible before submitting. For example, if you’re sharing a map of the A-Line trail at Whistler, don’t upload a file of an entire day’s ride at all the park’s trails, lift rides and all. Trim the track data to include only the designated trail, and also add any points of interest — like trailheads — as waypoints if appropriate.
Once you submit your GPX trail map data, someone from the Singletracks team will take a look before it’s posted to the site, which may take several days depending on how much we’re out riding. On both of these forms there is a link to email someone at Singletracks directly in case you have any questions or are having trouble.
Adding a trail to Singletracks is a great way to let mountain bikers know about the best places to ride, and if you post it, they will come. With that in mind, make sure that if you do share a trail, it’s legal to ride and it can handle the additional traffic. If not, consider keeping the info to yourself — but remember what your momma said about sharing with others.







0 Comments